Pages

Wednesday, July 31, 2013

Wait, That's Wallpaper?!?!

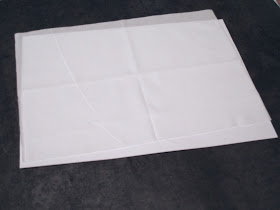
I mentioned to you last week when I was recapping my recent purchases that I chose some wallpaper for the stairs that lead up to the Master Bedroom.  What I haven't told you is how I chose that wallpaper, so by request, here are the samples that I ended up getting.  

I knew that I wanted a textured wallpaper, that way the boring white boards that are underneath the stair treads would stand out a little bit.  Most textured wallpapers now are made so that they can be painted over, and some actually require that you paint over them, which means that you can choose any paint color that you want to go over your textured wallpaper.  Even though The wallpapers come in white, I will still be painting mine over with a white paint, just to give it that finished look.  

I originally ordered a few samples from Graham & Brown and then I came across a collection of textured wallpapers from American Blind and Wallpapers and More, so I ordered some samples of those as well.  The first set of samples, the ones from Graham & Brown, were very interesting. I immediately nixed the two top patterns because they just didn't have enough interest for me. The other two were stripe patterns, and after feeling the difference between the actual textures, I removed the arranged striped wallpaper from consideration.  While I really liked the look of the even stripes, they were too soft, and I was worried that with feet potentially kicking up against the wallpaper, that the stripes would end up with too much wear and wouldn't look as nice after a while.

The last one in the group, the Bruno wallpaper, was the one that I kept in the running. I wasn't completely sold though. I really liked the way that it looks, but I was concerned that it wouldn't look as nice since the paper would only be about 8" high on every step.  The other thing that concerned me was that I would have to spend a lot of time trying to make sure that the stripes matched up with each other from stair to stair, because if they didn't, that would drive me crazy. My OCD would definitely come out on that one. 


The next group of wallpapers that I got were from American Blinds and Wallpaper and More.  They had a great collection, called Anaglypta X, and they have tons of different patterns to choose from. I really wanted to get all of them, but I narrowed it down to four again to get samples of.  

The first one that I received was a very random pattern that reminded me of a room divider that my aunt and grandparents used to have to separate the kitchen from the dining room, so after seeing the pattern in person, I immediately said no.  The second sample I received was a very cool and somewhat modern pattern that looked like flat blades of grass. I really liked the way this one looked, so I kept it in the running.  The third one that I received was supposed to look like the picture below with the paint roller in it, but that's definitely not the sample that I received, which was not my style at all.  The last one I really liked. It was very modern and the pattern of the squares touching each other gave it some visual interest.  The only issue with this was that I think it is too modern for my house. While I love a modern design, I'm trying to be a little more contemporary/transitional since some of the decor in our home is more traditional.  


So out of all of the samples that I received, you know that I have selected the flat grass blade pattern from the Anaglypta collection by American Blinds and Wallpaper and More.  The pattern just spoke to me, and while it's modern, it's not scream-in-your-face modern.

It's really neat to see how much wallpaper has transformed over the last few years. What has almost always been seen as taboo and a pain in the neck is now available in textures and awesome patterns that can really transform a room.  Plus, with the ability to apply the wallpaper only temporarily, they have become very popular for renters looking to personalize their space.

I am so excited to see where I can include wallpaper in my home.  What are your thoughts on wallpaper? Are you still terrified of it? Are you using any in your home?

Friday, July 26, 2013

Flash Sale Friday: Luxurious Plush White Bedroom

It's time for another...


Each week, I will be featuring some of the week's best picks from my favorite Flash Sale sites and creating a room inspiration board for all of you to enjoy!  If you have a room that needs decorating and you are looking for some inspiration, feel free to email me what you are looking for, and I'll see what I can come up with for you, and you will be featured in a future Flash Sale Friday post!

If you would like to become a member to one of the sites featured in this Flash Sale Friday post, feel free to create an account from the links I have provided below.

Fab

I'm not typically one to use gold in my decor or in my style. I tend to lean towards silver metallics, but the gold along with the white for this bedroom just screams luxury.  This room and all of the decor reminds me of a ritzy hotel, one with a bed that has a million pillows on it, and the most elegant and soft white comforter.  

With a light blue color on the wall, the gold and whites will really stick out, and the calming sense that the color brings will help you relax in your newly designed bedroom.  


How do you feel about your bedroom? Wouldn't you want to your bedroom to be this luxurious?  

Please Note: All of the images in this post have been used with permission. Images were not modified or altered to fit in this inspiration board. Flash Sale invitation links may provide me with rewards if items are purchased by a new member.

Thursday, July 25, 2013

I Buy a Lot of Rugs

Over the last few months, I have been collecting and purchasing items for when the time comes to decorate our house.  I figured that I would give you a preview of what I have purchased before they get discontinued, just in case you want to purchase them too!

One of the first things that I purchased was the rug for the Family Room, which I know that I have talked about before, but, I am so obsessed with this Surya rug.  It is so soft, and the color is amazing!  I purchased this rug after realizing that it was being discontinued, so the price had been slashed at an incredible discount. I was able to score the 8'x10' rug for $220, where it was originally listed at $770! Amazing, right?!?!?!?!


Some of the sizes for this rug are still available from RugStudio, so you can still order this if you want it. Plus, it comes in other colors than the purple that I chose - normal colors, like brown, tan/camel, red, gray, and black.

The next thing that I purchased was some wallpaper.  You may be thinking that I'll be putting this on the walls in one of the rooms in our house, but you would be wrong.  I'm actually thinking of adding the wallpaper on the staircase, under the stair treads.  I think that having a little texture there would add something interesting to the staircase as your walking up it to the second floor.  I ended up choosing a bunch of different patterns from American Blinds and Wallpaper and More, got samples of those patterns, and ended up choosing one of them.


I think that this grass-like pattern will look really cool below the stair treads. It comes in white, but to help not see the actual grains in the wallpaper, you are supposed to paint over it once you have it installed.  I'm just going to stick with white so that it matches the rest of the trim work in the house.
Next, is another rug.  I had been looking for an outdoor rug for the sitting area in our backyard makeover for a long long time.  I was originally looking for a yellow Greek-key rug, but couldn't find one in the right shade of yellow or one that was approved for outdoor use.  I wanted to include it in my inspiration board for the backyard, but I just couldn't find one that I liked.  One day, while randomly browsing Target, I came across their outdoor section, and lo and behold, I found this rug.


It's not exactly what I was looking for, but the colors were spot on with what I was looking to do outside, and the rug is dark for the most part, which means that it will actually look cleaner over time since the dirt won't show as much.  Plus, at only $60, it was hundreds of dollars cheaper than any other rug that I was finding, which is always a win-win!

And the last thing for now is yet another set of rugs! Surprise surprise, right? Not really, I know.  I've been looking for a few runners for the hallways on the first floor, so after looking for something with a pattern, I decided to just go with something plainer.  The hallways will be painted with vertical light green stripes, so I figured that staying with a solid color rug in the hallways would be a better idea than having too many patterns in one small space.


I found these great looking silver/light gray runners on Overstock.com and am hoping that they are going to look good in the space. I bought two different sizes since one hallway is longer than the other, but because of a sale that Overstock was having, plus a promo code, I only spent $105 on both, including shipping, which was actually free!  I am now thinking that they will really look nice against a darker wood floor, so I'm excited to see everything put together.

So, those are my most recent purchases, all of which are currently rolled up and being stored in the coat closet by the front door of the house.  I can't wait to get things into place and see everything put together. I am really hoping that my visions on paper and on my digital screens actually looks good in real life.

Have you made any awesome home decor purchases lately? Where are your favorite sites and stores to get a deal?

Tuesday, July 23, 2013

Choose a Color, Any Color

We may have had a blessing in disguise happen to us.  I'm not going to go into too much detail about it right now, but we may have been given the opportunity to have the hardwood floors in our house refinished.  If you remember our house tour, the first floor hardwoods are your typical light stained oak, which was the standard for homes built in the 1950s.  The hardwoods in our house are original, and they are in great shape, because it seems as though they were carpeted over at some point.  Having grown up with rooms that had the traditional light stained oak, I am more than fine with the color that they currently are, however, with the opportunity to refinish the floors, I'm actually considering changing up the stain color.

As a reminder, here is the current color of the floors in the house.


When comparing the floor color to Minwax, which is one of the two stain brands that I am using to choose color, this floor is a close match to Ipswitch Pine.

Stain Colors via Minwax

I'd like to make the floors darker, and while I know that will show the dust and the cat hair more, I am hoping that it will actually help in motivating me to keep the house clean.  Also, the elegance that dark floors bring to a space far exceeds the extra amount of work that may come with having darker wood floors.  Agreed?

I've been going between the Dark Walnut stain and the Jacobean stain.  I think that the two colors will look very different depending on the room, as the room pictured above gets a lot of natural light, whereas the bedrooms in the back of the house don't get a lot of natural light at all.  So, I have to be very careful that the color stain that I choose will work in both places.  

I came across a blog post by Ashley and Greg from 7th House on the Left where they were refinishing their floors and debating between these two colors plus one more as well.  Reading about their experience has been very helpful, and we are planning on getting a sample laid on the floors before we choose the color too, so hopefully that will help us decide.  

What do you think about the two colors? I know that they are very similar, especially when you compare the digital swatches, but the actual paper-copy swatches make the two colors look kinda different, with the Dark Walnut appearing slightly redder than the Jacobean.  


Eh, maybe you can't see the difference...this is a terrible picture, and it's hard to see the difference even with some light editing.  Maybe I should try to get a fan deck of the stain colors - that may help out with determining the color that we want to choose.  Anyone know where I can get one of those? I should just start collecting all of the paint and stain brand fan decks. OMG, I would be in heaven....

Anyways...


Do any of you have experience with the Dark Walnut or Jacobean stains? What's your favorite non-red tinted floor stain color?  Have you used Minwax on your floors? What other brands did you use for floors? Can you tell I have a million questions?!

Friday, July 19, 2013

Flash Sale Friday: Relaxed Beachy Dining Room

It's time for another...


Each week, I will be featuring some of the week's best picks from my favorite Flash Sale sites and creating a room inspiration board for all of you to enjoy!  If you have a room that needs decorating and you are looking for some inspiration, feel free to email me what you are looking for, and I'll see what I can come up with for you, and you will be featured in a future Flash Sale Friday post!

If you would like to become a member to one of the sites featured in this Flash Sale Friday post, feel free to create an account from the links I have provided below.

Fab

This week's Flash Sale Friday is a comfortable and relaxed dining room with a slight beachy feel without it being too nautical.  By sticking with natural elements, like raw wood and linen fabrics, the cleanliness and simplicity of this room will shine in your home.  Choosing an accent color of green really helps to balance out the room, making it feel a little modern while also bringing in just a splash of color to wake it up.

While this room doesn't have very many accessories, more can be added based on your taste in style.  Please keep in mind that these room inspiration boards contain only items that are currently featured on the Flash Sale websites, so accessories can be limited when creating these inspiration boards.


I'm in love with the green color - in fact it's one of the ones that I have chosen for my hallway when I get around to painting!

What do you think of this room? How have you decorated your dining room?


Please Note: All of the images in this post have been used with permission. Images were not modified or altered to fit in this inspiration board. Flash Sale invitation links may provide me with rewards if items are purchased by a new member.

Thursday, July 18, 2013

I Need Landscape Help!

As if our house didn't already have enough landscaping projects, now that we have had the three large trees removed in the front, we have even more on our plate.  Now that our house can be seen from the road, we will need to make sure that the landscaping is up to par with the rest of the houses in our neighborhood.


Over the last few days, I have been spending the afternoon outside weeding out the garden beds, and actually pulling out all of the weeds that are growing in our grass.  We also still have a good amount of pine needles in the front garden bed from where the trees were.  There is about a six inch layer of pine needles in that garden bed because the previous owner of the house never did a single thing to the landscaping, so years of dead needles have layered up under where the trees were.  And actually if you look at the photo below, all of the orange/rust color that you see in that garden bed is dead pine needles.


In an attempt to get rid of the needles, I raked a section that was probably about 4'x6' and it filled an empty 32-gallon trash can to the top.  With the entire section being about 12' wide by 90' long, it's going to take quite a lot of trash cans/yard waste bags to get the area cleaned up.

Also, now that the trees are gone, there is a direct view of the side of the house, which is where the air conditioning unit and all of the utility hookups are.


This is quite the eye sore, especially since, as you can see, we removed two of the burning bushes that were against the house so that the new air conditioner could actually fit.  We will eventually dig out the rest of those burning bushes, but we haven't gotten to it yet.  I have plans to build a shield for the unit and the other utilities on the side of the house, but it will have a hinged door so that everything can be accessed.  Don't worry, I'll post a DIY when I make it.

In the meantime, however, we have been trying to figure out what we would like to plant. I know that we will be planting an adolescent white birch tree, and we will be keeping the rhododendrons that are planted in that space.  Other than that though? We have no idea, except that we want some flowering plants since most of the ones along the house are evergreens.  I love hydrangeas, but I'm worried about them and the rhododendrons getting too big eventually.

So, I guess what I'm saying is, help?

What would you plant in that big of a space if you had a completely blank slate?

Monday, July 15, 2013

Green Thumb Update

Back in April, I gave you all a DIY for a non-traditional Raised Bed Planter.  After that, I talked with you about what I planted in that planter, and how I labeled all my herbs.

Now, after weeks and weeks of waiting for something other than weeds to show up in my planter, I am happy to say that I have herbs!

They took a lot longer than I thought to germinate and pop through to the surface, but I am so happy that I do actually have a green thumb.


Clockwise: Chives, Rosemary, Oregano, and Parsley.


Basil

The garlic that I planted starting growing thin, little green stems, and then they died, so I'm hoping that the garlic is still growing under the soil.  Guess I'll find out for sure when it's time to harvest!

In the meantime, I can't wait for these other little herbs to grow large enough for me to pick them.  Anyone else having a more than difficult time with their gardens this season? Anyone having great luck? I'll take all the pointers I can get!

Friday, July 12, 2013

Flash Sale Friday: Classic Neutrals with a Pop

I have been working on a special project for you. Are you ready for it's big reveal?


I have decided to start doing a weekly series here on Rhody Life.  With my slight total obsession with Flash Sales and getting the best deals on furniture and home decor, I will be featuring some of the week's best picks from my favorite Flash Sale sites and creating a room inspiration board for all of you to enjoy!  If you have a room that needs decorating and you are looking for some inspiration, feel free to email me what you are looking for, and I'll see what I can come up with for you, and you will be featured in a future Flash Sale Friday post!

If you would like to become a member to one of the sites featured in this Flash Sale Friday post, feel free to create an account from the links I have provided below.


This week's Flash Sale Friday is a culmination of neutral colored fabrics and furniture with a pop of color - Turquoise Blue.  I love how clean looking this room is.  And a great thing about it is that the color is brought in with accessories, which means that you can switch them out at any time and make your room look completely different!  While this turquoise color would be great for Summer, you could switch it for a deep red for the Fall or Winter, or even add in a nice green for Spring.

The tufted furniture gives you a traditional feel for the space, but the nail heads on all three pieces, the chair, the ottoman, and the couch tie the room together.


What do you love most about this inspiration board? Can you see something like this in your house?

Please Note: All of the images in this post have been used with permission. Images were not modified or altered to fit in this inspiration board. Flash Sale invitation links may provide me with rewards if items are purchased by a new member.

Wednesday, July 10, 2013

DIY: Marketing Logos and Labels

With Rhody Life becoming something more than I ever thought it could be, I have found the need to mark my work.  Since I'm making a lot of different products, I needed to find a way to tag my items as being handmade by Rhody Life.

A few years ago, I came across a post on how to make fabric logos, and bookmarked it for future reference.  I have modified the directions slightly, after figuring out that my old-school inkjet printer from college(!) will actually print directly onto thin fabrics!

First step was to create the logo. You can use any photo editor, and even Microsoft Word or PowerPoint to do this.  Since I wanted to use the main part of my blog header, I just opened that file, saved as a copy, and then made changes to it to fit the logo aspect of my brand.


After I was satisfied with the way that it looked, I exported the file as a JPG. I then opened Microsoft Word, and added the photo to the document. I resized the photo to be approximately 1.5"x.5" and then copied and pasted it onto the sheet, arranging each individual image in an array for printing.


Send your document to the printer. Make sure to test out the colors on a plain piece of paper first. You want to be able to proofread in case there are any mistakes.  Also, if you have the same color paper as the fabric you will be using, you should run a test print on that to make sure that the color of the paper doesn't mess with the color of the ink.  


Once your paper copies are to your satisfaction, prep your fabric for printing.  If you have an old-school inkjet printer like me, you may be able to print directly onto the fabric by just running it through the paper tray.  Make sure to iron your fabric flat before running it through the printer.  The less wrinkles, the easier it will feed through the paper tray.  


If your fabric is too silky or flimsy, you may need to scotch tape one of the short ends to a piece of paper, and then feed both through the printer at the same time.  Using the piece of paper will help your fabric stay in place and feed correctly.  

Once your fabric has been printed on, check for quality, and then cut out your labels.  


Once your labels are cut, you can choose to finish them with a protective coating, like clear nail polish or ModPodge, but just be aware that some clear coat items are not flame resistant, so use them in areas not near extreme heat or flames.  


When your label is finished, you may attach it to your item.  You have some choices here as to whether you want to sew it in place or use an adhesive of some kind to help it stick.  For my example below, I chose to sew my label into the bottom of the lamp shade that I made for my IKEA Orgel.  


Once you have put your label on your product, you are good to go!

Now, for those items that I can't attach a fabric label to, I have come up with another idea.  I have created a small, medium, and large template of my logo. When I am ready to add the logo to my product, I just have to line up where I want it to be, and trace over the logo with a pencil.

Once the logo is traced on the product, I will use my wood burner to go over the lines, imprinting the Rhody Life logo onto the item.


To make the logo look more like the header I use for Rhody Life, I will then go back and add in the horizontal lines within the letters.  Don't be afraid to play around with the different tips and positions that you can hold the wood burner. There are a lot of really neat patterns that you can come up with if you practice.  


Once I had the letters finished, I changed tips on the wood burner to the fine-point angled tip, and then wrote in the rest of the label.  

For the first one, it didn't come out too poorly, but with practice, they will get better!


I am so excited to use these on my products! I can't wait to be able to tag things as being homemade and to represent Rhody Life!

Have you made yourself labels or a logo? How have you gone about branding yourself or your business? 

Monday, July 8, 2013

DIY: Refreshed Grout Lines

D and I have talked about renovating the master bathroom, but there are so many other projects that we would rather do, that we have pushed a full bathroom renovation to the bottom of the list.  In the meantime, however, we have plans to do some minor things to the bathroom that will be functional and look nice.

So, while the tile flooring in the bathroom is in good condition, the grout lines are not.  In high traffic areas, the grout lines have turned black, whereas in other areas, like behind the toilet, the areas are still a light gray, which is what I'm assuming was the original grout color.  The dirty grout lines don't only look gross, but they actually stick out too, so the focus on the floor becomes the grout lines instead of the tiles, even though those aren't the most attractive either.  


I came across this stuff at Home Depot, called Grout Renew.  I picked up a couple of bottles in the Snow White color and decided that coloring the grout would help it look better than it's current state of gross.  


Before applying the Grout Renew to the floor, I used a cleaner to get as much of the dirt out as possible.  Then, I poured a small amount of the Grout Renew onto the tile.  


Using a soft-bristled toothbrush, I spread a thin layer of the colorant onto the grout lines, careful that it didn't pool on any of the grout lines. I started with a small area first to test out how quickly it dried.  Since the areas that I covered below hadn't dried when I ran out, I knew that I could cover a little more surface area at a time for the rest of the bathroom.

After brushing the Grout Renew onto the grout lines, I went back with a damp paper towel, and wiped the excess colorant off of the tile edges.  Then, I left this one test area to dry.  


The Grout Renew didn't dry as white as I wanted it, but I think that mainly has to do with how dark the grout lines were to begin with and how thin a layer I applied.  Since I only did this small test area, I have plans to go back and add a second coat to see if it dries a little more white, and hides the dark grout lines underneath.  

For those of you who decide that Grout Renew is something that will make a big difference in your house, keep in mind that you may need to go a little heavier on your first coat, or apply two separate coats, especially if your grout lines are dark to begin with.

With our bathroom being a little larger than 300 square feet, I have a long way to go with this project, so I will have to leave you in suspense for the full before and after pictures.

Have you ever used Grout Renew? Are you looking forward to changing the color of your tile grout now that you have been introduced to this product?

Friday, July 5, 2013

And Then There Were None

In the never-ending landscaping saga, we had yet another item on our to-do list.  And that item was way bigger than we could do ourselves, so we hired out.  And that item??

Removing some trees.

Our front yard was mainly taken over by three absolutely gigantic Scotch Pine trees.  Don't get me wrong, they are beautiful in the snow, and they gave us a lot of privacy, but they were taking over our yard, and not in a good way - I mean, it's not like they can weed all my garden beds, right? :)  The other downside to the trees was that they were hiding the house, and making it difficult for anyone to find our house, including the fire department! I know, it sounds impossible, but when your address is on street A and your driveway and front door are on street B with three 60-ft trees hiding it, it is kind of difficult to find.

Yep, there's actually a house back there! Now you know why it's so difficult to find!

We called up our tree guy, David from Schwartz Tree & Landscape, and after evaluating whether or not we could just trim back the trees, or remove one or two of them, he said that it would be best to just remove all three of them.

Before shots of the trees. Clockwise: 1 - From the driveway; 2 - From the front door; 3 - From the Master Bedroom; 4 - From the street, on the left.

Three weeks later, the crew arrived at the house, and spent nine hours taking down the trees, and they still have a little more to go.  But the change is dramatic!

While you would expect them to start at either the top or the bottom of the trees, they did neither. The guy in the cherry-picker literally drove himself into the middle of the tree and started working out from there, making himself a huge hole, and doing some interesting balancing acts in the cherry-picker to cut off some hard-to-reach branches.


It took about two hours to get all of the branches cut off of the first tree, and another hour to get all of the branches through the chipper.  


WnbgMd on Make A Gif, Animated Gifs


Once all of the branches were off, it was time to take the trunk down.  First step was to make a notch at the base of the trunk to control the direction that it will fall.  In the video below, you will see the guy cut the rest of the trunk and see it fall.  And pay attention to the size of the guy in comparison to the trunk. I'm not kidding when I say that these trees are massive.  


Once the trunk was down and all of the large logs removed, it was time for the stump grinder to be used.  Since the grinder shoots the wood chips everywhere, the guys put up a netting around the workspace to shield the grass from the chippings.  


The stump grinder was a rotating blade that went back and forth along the stump, literally grinding it to pieces.  The guys went about 18" into the ground with the grinder too, just to make sure that we have plenty of space for planting, and that we won't run into any major root systems in the area.  


And in less than five minutes, the stump was completely gone, and all that was left was wood chips and dirt.  

The other two trees came down in about the same time, a few hours each.  The rains came in the late afternoon though, and that halted work on the rest of the tree stumps and grinder, because everything was so wet that it was sticking to the machine blades and getting stuck.  So, on Saturday, the rest of the logs that you see in the picture will be taken away, and the two stumps will be ground out.  

Perspective on the size of the stumps - and yes, we counted the rings to figure out the age, and we got to 70! 

Some of you may be thinking that with all of those trees being gone, we would have a great stock of firewood on our hands, but unfortunately, all of the wood had to be taken away and none of it could be used for firewood, because of the amount of sap that was coming out of the branches.  The picture below was taken about five minutes after the branch was sawed off, and yes, that is sap, not rain.  


And finally, now for the final reveal! I've made a collage like above that corresponds as closely as I can get to the before pictures.  Ready?


And then there were none.  Amazing difference, right?  I can't believe how big the yard looks, and how good it makes the house look.  Plus, people can find our house now, and we will get a beautiful and unobstructed view of all the sunsets now since we're facing West.

We've met at least six new neighbors since the trees came down, mainly because everyone in the neighborhood is shocked that we took them down, but all of them seem really happy about the difference that it makes.  We are now so excited to do some additional planting, and already have some things in mind to add to the landscaping.

Have you removed any trees lately?  How much did it impact your property?