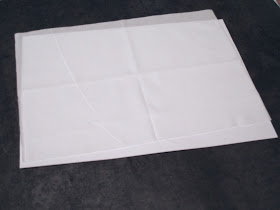
A few years ago, I came across a post on how to make fabric logos, and bookmarked it for future reference. I have modified the directions slightly, after figuring out that my old-school inkjet printer from college(!) will actually print directly onto thin fabrics!
First step was to create the logo. You can use any photo editor, and even Microsoft Word or PowerPoint to do this. Since I wanted to use the main part of my blog header, I just opened that file, saved as a copy, and then made changes to it to fit the logo aspect of my brand.
After I was satisfied with the way that it looked, I exported the file as a JPG. I then opened Microsoft Word, and added the photo to the document. I resized the photo to be approximately 1.5"x.5" and then copied and pasted it onto the sheet, arranging each individual image in an array for printing.
Send your document to the printer. Make sure to test out the colors on a plain piece of paper first. You want to be able to proofread in case there are any mistakes. Also, if you have the same color paper as the fabric you will be using, you should run a test print on that to make sure that the color of the paper doesn't mess with the color of the ink.
Once your paper copies are to your satisfaction, prep your fabric for printing. If you have an old-school inkjet printer like me, you may be able to print directly onto the fabric by just running it through the paper tray. Make sure to iron your fabric flat before running it through the printer. The less wrinkles, the easier it will feed through the paper tray.
If your fabric is too silky or flimsy, you may need to scotch tape one of the short ends to a piece of paper, and then feed both through the printer at the same time. Using the piece of paper will help your fabric stay in place and feed correctly.
Once your fabric has been printed on, check for quality, and then cut out your labels.
Once your labels are cut, you can choose to finish them with a protective coating, like clear nail polish or ModPodge, but just be aware that some clear coat items are not flame resistant, so use them in areas not near extreme heat or flames.
When your label is finished, you may attach it to your item. You have some choices here as to whether you want to sew it in place or use an adhesive of some kind to help it stick. For my example below, I chose to sew my label into the bottom of the lamp shade that I made for my IKEA Orgel.
Once you have put your label on your product, you are good to go!
Now, for those items that I can't attach a fabric label to, I have come up with another idea. I have created a small, medium, and large template of my logo. When I am ready to add the logo to my product, I just have to line up where I want it to be, and trace over the logo with a pencil.
Once the logo is traced on the product, I will use my wood burner to go over the lines, imprinting the Rhody Life logo onto the item.
To make the logo look more like the header I use for Rhody Life, I will then go back and add in the horizontal lines within the letters. Don't be afraid to play around with the different tips and positions that you can hold the wood burner. There are a lot of really neat patterns that you can come up with if you practice.
Once I had the letters finished, I changed tips on the wood burner to the fine-point angled tip, and then wrote in the rest of the label.
For the first one, it didn't come out too poorly, but with practice, they will get better!
I am so excited to use these on my products! I can't wait to be able to tag things as being homemade and to represent Rhody Life!
Have you made yourself labels or a logo? How have you gone about branding yourself or your business?


I sign things with my initials and year in Sharpie on the items I've made. This is great for things that I've sewn.
ReplyDeleteYou are so creative. Thanks for this wonderful post/tip/idea.
ReplyDeleteLove this!
ReplyDeleteThis is awesome! Years ago I used to have another business where I made and sold hand-made goods, and I purchased fabric with my logo and message on it that I used as the tags- but I have yet to try and make them myself! Very cool! Love the wood too!
ReplyDelete